TerraformなどのIaCのツールを使ってシステムを構築するメリットの一つに冪等性があります。ですが、EKSのようなKubernetesクラスタを構築した後、継続的デプロイのためにArgoCDをインストールする段階で kubectlやhelmコマンドを使いがちです。(ArgoCDのインストールの解説はkubectlやhelmコマンドで説明される事が多いです。) このようにすると冪等性が保てなくなってしまいます。
本記事では、ArgoCDのインストールやArgoCDのアプリケーションのカスタムリソースの登録までをTerraformでIaC化する方法を解説します。
事前準備
ローカルPCに以下をインストールして、セットアップしてください。
また、独自のドメインアドレスでArgoCDを公開したい場合はAmazon Route53上でドメインのHostZoneの設定をしてください。
EKSクラスタの構築
最初にEKSクラスタをTerraformで構築します。以下のように main.tf, providers.tf, variables.tf, outputs.tf ファイルを作成します。
main.tf
TerraformのAWS moduleを使ってVPCやEKSクラスタを構築します。
# EKS Cluster Configuration
module "eks" {
  source  = "terraform-aws-modules/eks/aws"
  version = "~> 19.0"

  cluster_name    = var.cluster_name
  cluster_version = var.cluster_version

  cluster_endpoint_public_access = true

  vpc_id     = module.vpc.vpc_id
  subnet_ids = module.vpc.private_subnets

  # EKS Managed Node Group(s)
  eks_managed_node_groups = {
    spot_nodes = {
      name = "spot-node-group"

      instance_types = ["t3a.medium"]
      capacity_type  = "SPOT"

      min_size     = var.min_nodes
      max_size     = var.max_nodes
      desired_size = var.desired_nodes

      vpc_security_group_ids = [
        aws_security_group.node_group_sg.id
      ]
    }
  }

  tags = var.tags
}

# VPC Configuration
module "vpc" {
  source  = "terraform-aws-modules/vpc/aws"
  version = "~> 5.0"

  name = "${var.cluster_name}-vpc"
  cidr = var.vpc_cidr

  azs             = var.availability_zones
  private_subnets = var.private_subnets
  public_subnets  = var.public_subnets

  enable_nat_gateway   = true
  single_nat_gateway   = true
  enable_dns_hostnames = true

  public_subnet_tags = {
    "kubernetes.io/cluster/${var.cluster_name}" = "shared"
    "kubernetes.io/role/elb"                    = "1"
  }

  private_subnet_tags = {
    "kubernetes.io/cluster/${var.cluster_name}" = "shared"
    "kubernetes.io/role/internal-elb"           = "1"
  }

  tags = var.tags
}

# Security Group for Node Group
resource "aws_security_group" "node_group_sg" {
  name        = "${var.cluster_name}-node-group-sg"
  description = "Security group for EKS node group"
  vpc_id      = module.vpc.vpc_id

  egress {
    from_port   = 0
    to_port     = 0
    protocol    = "-1"
    cidr_blocks = ["0.0.0.0/0"]
  }

  tags = merge(
    var.tags,
    {
      Name = "${var.cluster_name}-node-group-sg"
    }
  )
}
providers.tf
awsプロバイダの他にkubernetesプロバイダを使います。
# AWS Provider Configuration
terraform {
  required_providers {
    aws = {
      source  = "hashicorp/aws"
      version = "~> 5.97.0"
    }
    kubernetes = {
      source  = "hashicorp/kubernetes"
      version = "~> 2.36"
    }
  }
  required_version = ">= 1.12.0"
}

provider "aws" {
  region = "us-west-2"
}

# Kubernetes provider configuration for EKS
# This will be used after the cluster is created
provider "kubernetes" {
  host                   = module.eks.cluster_endpoint
  cluster_ca_certificate = base64decode(module.eks.cluster_certificate_authority_data)

  exec {
    api_version = "client.authentication.k8s.io/v1beta1"
    command     = "aws"
    args        = ["eks", "get-token", "--cluster-name", var.cluster_name]
  }
}
variables.tf
cluster_name や、Projectは、適宜変更してください。リージョンが us-west-2以外の場合は availability_zones も変更してください。
# Cluster Configuration
variable "cluster_name" {
  description = "Name of the EKS cluster"
  type        = string
  default     = "<あなたのクラスタ名>"
}

variable "cluster_version" {
  description = "Kubernetes version to use for the EKS cluster"
  type        = string
  default     = "1.32"
}

# Node Group Configuration
variable "min_nodes" {
  description = "Minimum number of nodes in the EKS node group"
  type        = number
  default     = 1
}

variable "max_nodes" {
  description = "Maximum number of nodes in the EKS node group"
  type        = number
  default     = 3
}

variable "desired_nodes" {
  description = "Desired number of nodes in the EKS node group"
  type        = number
  default     = 2
}

# VPC Configuration
variable "vpc_cidr" {
  description = "CIDR block for the VPC"
  type        = string
  default     = "10.0.0.0/16"
}

variable "availability_zones" {
  description = "List of availability zones in the region"
  type        = list(string)
  default     = ["us-west-2a", "us-west-2b", "us-west-2c"]
}

variable "private_subnets" {
  description = "List of private subnet CIDR blocks"
  type        = list(string)
  default     = ["10.0.1.0/24", "10.0.2.0/24", "10.0.3.0/24"]
}

variable "public_subnets" {
  description = "List of public subnet CIDR blocks"
  type        = list(string)
  default     = ["10.0.101.0/24", "10.0.102.0/24", "10.0.103.0/24"]
}

# Tags
variable "tags" {
  description = "A map of tags to add to all resources"
  type        = map(string)
  default = {
    Environment = "dev"
    Project     = "<あなたの開発プロジェクトの名前>"
    Terraform   = "true"
  }
}
outputs.tf
Terraformにて環境構築時に設定された値を取得できるようにしておきます。
# EKS Cluster Outputs
output "cluster_id" {
  description = "EKS cluster ID"
  value       = module.eks.cluster_id
}

output "cluster_endpoint" {
  description = "Endpoint for EKS control plane"
  value       = module.eks.cluster_endpoint
}

output "cluster_security_group_id" {
  description = "Security group ID attached to the EKS cluster"
  value       = module.eks.cluster_security_group_id
}

output "cluster_name" {
  description = "Kubernetes Cluster Name"
  value       = module.eks.cluster_name
}

output "cluster_certificate_authority_data" {
  description = "Base64 encoded certificate data required to communicate with the cluster"
  value       = module.eks.cluster_certificate_authority_data
  sensitive   = true
}

# Node Group Outputs
output "node_security_group_id" {
  description = "Security group ID attached to the EKS nodes"
  value       = aws_security_group.node_group_sg.id
}

# VPC Outputs
output "vpc_id" {
  description = "The ID of the VPC"
  value       = module.vpc.vpc_id
}

output "private_subnets" {
  description = "List of IDs of private subnets"
  value       = module.vpc.private_subnets
}

output "public_subnets" {
  description = "List of IDs of public subnets"
  value       = module.vpc.public_subnets
}

# Command to configure kubectl
output "configure_kubectl" {
  description = "Command to configure kubectl to connect to the EKS cluster"
  value       = "aws eks update-kubeconfig --region us-west-2 --name ${module.eks.cluster_name}"
}
上記のファイルを作成したら、tfファイルのあるディレクトリで以下のコマンドを実行してKubernetesクラスタを構築します。
terraform init
terraform apply
outputs にkubectlの設定を更新するコマンドが表示されるのでそれを実行します。
aws eks update-kubeconfig --region us-west-2 --name "<あなたのクラスタ名>"
実行後にPodが動いている状態を確認した時のコマンドと結果の例を以下に示します。
$ kubectl get pods -A
NAMESPACE     NAME                       READY   STATUS    RESTARTS   AGE
kube-system   aws-node-g7fq7             2/2     Running   0          4m41s
kube-system   aws-node-x6p6n             2/2     Running   0          4m39s
kube-system   coredns-5449774944-h64mz   1/1     Running   0          24m
kube-system   coredns-5449774944-tfvsg   1/1     Running   0          24m
kube-system   kube-proxy-j2n4b           1/1     Running   0          4m39s
kube-system   kube-proxy-jkj4c           1/1     Running   0          4m41s

$ eksctl get nodegroup --cluster lean-saas-eks
CLUSTER     NODEGROUP                   STATUS  CREATED         MIN SIZE    MAX SIZEDESIRED CAPACITY    INSTANCE TYPE   IMAGE ID        ASG NAME                        TYPE
lean-saas-eks   spot-node-group-20250518020521810000000001  ACTIVE  2025-05-18T02:05:24Z    1      3  2t3a.medium AL2023_x86_64_STANDARD  eks-spot-node-group-20250518020521810000000001-7ccb7091-c00f-ff44-c95d-d5bd49313ef3 managed

$ kubectl get services -A
NAMESPACE     NAME                        TYPE        CLUSTER-IP      EXTERNAL-IP   PORT(S)                  AGE
default       kubernetes                  ClusterIP   172.20.0.1      <none>        443/TCP                  28m
kube-system   eks-extension-metrics-api   ClusterIP   172.20.114.10   <none>        443/TCP                  28m
kube-system   kube-dns                    ClusterIP   172.20.0.10     <none>        53/UDP,53/TCP,9153/TCP   26m
Helmプロバイダの追加
本記事では、構築したKubernetesクラスタにArgoCD等のアプリケーションをインストールするのにHelmを使用します。TerraformでHelmを使ってアプリケーションをインストールするためにproviders.tf ファイルにHelmプロバイダを追加します。
providers.tf
# AWS Provider Configuration
terraform {
  required_providers {
# 中略
    helm = {
      source  = "hashicorp/helm"
      version = "~> 2.17"
    }
# 中略
}
# 中略
# Helm provider configuration for EKS
# This will be used to deploy Helm charts to the cluster
provider "helm" {
  kubernetes {
    host                   = module.eks.cluster_endpoint
    cluster_ca_certificate = base64decode(module.eks.cluster_certificate_authority_data)

    exec {
      api_version = "client.authentication.k8s.io/v1beta1"
      command     = "aws"
      args        = ["eks", "get-token", "--cluster-name", var.cluster_name]
    }
  }
}
AWS Load Balancer Controllerのインストール
続いてアプリケーションをALB経由で外部に公開できるようにAWS Load Balancer ControllerをEKSにインストールします。 alb_controller.tf ファイルを作成します。
alb_controller.tf
# AWS Load Balancer Controller Installation

# IAM Policy for AWS Load Balancer Controller
data "http" "aws_load_balancer_controller_policy_json" {
  url = "https://raw.githubusercontent.com/kubernetes-sigs/aws-load-balancer-controller/v2.11.0/docs/install/iam_policy.json"
}

resource "aws_iam_policy" "aws_load_balancer_controller" {
  name        = "AWSLoadBalancerControllerIAMPolicy"
  description = "IAM policy for AWS Load Balancer Controller"
  policy      = data.http.aws_load_balancer_controller_policy_json.body
}

# IAM Role for AWS Load Balancer Controller
module "lb_controller_role" {
  source = "terraform-aws-modules/iam/aws//modules/iam-assumable-role-with-oidc"
  version = "~> 5.55.0"

  create_role = true
  role_name   = "aws-load-balancer-controller"

  provider_url = replace(module.eks.cluster_oidc_issuer_url, "https://", "")

  role_policy_arns = [
    aws_iam_policy.aws_load_balancer_controller.arn
  ]

  oidc_fully_qualified_subjects = [
    "system:serviceaccount:kube-system:aws-load-balancer-controller"
  ]
}

# Helm Release for AWS Load Balancer Controller
resource "helm_release" "aws_load_balancer_controller" {
  name       = "aws-load-balancer-controller"
  repository = "https://aws.github.io/eks-charts"
  chart      = "aws-load-balancer-controller"
  namespace  = "kube-system"
  version    = "1.13.2"  # Specify the chart version compatible with controller v2.11.0

  depends_on = [
    aws_iam_policy.aws_load_balancer_controller,
    module.lb_controller_role
  ]

  set {
    name  = "clusterName"
    value = var.cluster_name
  }

  set {
    name  = "serviceAccount.create"
    value = "true"
  }

  set {
    name  = "serviceAccount.name"
    value = "aws-load-balancer-controller"
  }

  set {
    name  = "serviceAccount.annotations.eks\\.amazonaws\\.com/role-arn"
    value = module.lb_controller_role.iam_role_arn
  }

  # Specify the controller version to match the IAM policy version
  set {
    name  = "image.tag"
    value = "v2.11.0"
  }

  # Enable webhook
  set {
    name  = "enableCertManager"
    value = "false"
  }

  set {
    name  = "webhookCert.create"
    value = "true"
  }

  # Region configuration
  set {
    name  = "region"
    value = "us-west-2"
  }

  set {
    name  = "vpcId"
    value = module.vpc.vpc_id
  }
}
ファイルを作成したら、以下のコマンドを実行して AWS Load Balancer Controllerをインストールします。
terraform apply
applyが成功した後に、AWS Load Balancer Controller がインストールされたかどうかを確認した時のコマンドと結果の例を以下に示します。
$ kubectl get deployment -n kube-system aws-load-balancer-controller
NAME                           READY   UP-TO-DATE   AVAILABLE   AGE
aws-load-balancer-controller   2/2     2            2           44s
サンプルのコンテナのデプロイ
では、ここまでで一旦コンテナをデプロイして、インターネットに公開できるかを確認してみましょう。
以下の nginx-alb.yaml のEKSマニフェストファイルを作成します。
apiVersion: apps/v1
kind: Deployment
metadata:
  name: nginx
  namespace: default
  labels:
    app: nginx
spec:
  replicas: 2
  selector:
    matchLabels:
      app: nginx
  template:
    metadata:
      labels:
        app: nginx
    spec:
      containers:
      - name: nginx
        image: nginx:1.21
        ports:
        - containerPort: 80
        resources:
          requests:
            cpu: 100m
            memory: 128Mi
          limits:
            cpu: 200m
            memory: 256Mi
        livenessProbe:
          httpGet:
            path: /
            port: 80
          initialDelaySeconds: 30
          periodSeconds: 10
        readinessProbe:
          httpGet:
            path: /
            port: 80
          initialDelaySeconds: 5
          periodSeconds: 5
---
apiVersion: v1
kind: Service
metadata:
  name: nginx
  namespace: default
  labels:
    app: nginx
spec:
  type: ClusterIP
  ports:
  - port: 80
    targetPort: 80
    protocol: TCP
    name: http
  selector:
    app: nginx
---
apiVersion: networking.k8s.io/v1
kind: Ingress
metadata:
  name: nginx-ingress
  namespace: default
  annotations:
    kubernetes.io/ingress.class: "alb"
    alb.ingress.kubernetes.io/scheme: "internet-facing"
    alb.ingress.kubernetes.io/target-type: "ip"
    alb.ingress.kubernetes.io/healthcheck-protocol: "HTTP"
    alb.ingress.kubernetes.io/healthcheck-port: "traffic-port"
    alb.ingress.kubernetes.io/healthcheck-path: "/"
    alb.ingress.kubernetes.io/listen-ports: '[{"HTTP": 80}]'
    alb.ingress.kubernetes.io/group.name: "nginx-alb-group"
spec:
  rules:
  - http:
      paths:
      - path: /
        pathType: Prefix
        backend:
          service:
            name: nginx
            port:
              number: 80
ファイルを作成したら以下のコマンドを実行してKubernetesクラスタにデプロイします。
kubectl apply -f nginx-alb.yaml
デプロイが成功した後で、Nginxが稼働しているかどうかを確認した時のコマンドと結果の例を以下に示します。
$ export ALB_ADDRESS=$(kubectl get ingress nginx-ingress -o jsonpath='{.status.loadBalancer.ingress[0].hostname}')
$ curl http://$ALB_ADDRESS
<!DOCTYPE html>
<html>
<head>
<title>Welcome to nginx!</title>
<style>
html { color-scheme: light dark; }
body { width: 35em; margin: 0 auto;
font-family: Tahoma, Verdana, Arial, sans-serif; }
</style>
</head>
<body>
<h1>Welcome to nginx!</h1>
<p>If you see this page, the nginx web server is successfully installed and
working. Further configuration is required.</p>

<p>For online documentation and support please refer to
<a href="http://nginx.org/">nginx.org</a>.<br/>
Commercial support is available at
<a href="http://nginx.com/">nginx.com</a>.</p>

<p><em>Thank you for using nginx.</em></p>
</body>
</html>
動作確認ができたら、以下のコマンドを実行してサンプルのデプロイを削除します。
kubectl delete -f nginx-alb.yaml
ArgoCDのインストール
では、本記事の山場であるArgoCDのインストールを開始します。 恐らくArgoCDの画面は、あなた独自ドメインでアクセスしたいと思いますので、Route53の設定などもTerraformで記述するようにしています。
argocd.tf
あなたの環境に合わせて domain_name と zone_id を設定してください。
# ArgoCD Installation

# Create a namespace for ArgoCD
resource "kubernetes_namespace" "argocd" {
  metadata {
    name = "argocd"
  }
}

# Helm Release for ArgoCD
resource "helm_release" "argocd" {
  name       = "argocd"
  repository = "https://argoproj.github.io/argo-helm"
  chart      = "argo-cd"
  namespace  = kubernetes_namespace.argocd.metadata[0].name
  version    = "8.0.3"  # Specify a stable version of the chart

  depends_on = [
    helm_release.aws_load_balancer_controller
  ]

  # Set ArgoCD server to be accessible via LoadBalancer
  set {
    name  = "server.service.type"
    value = "ClusterIP"
  }

  # Disable TLS on the server as we'll terminate TLS at the ALB
  set {
    name  = "server.extraArgs[0]"
    value = "--insecure"
  }

  # Configure resources for ArgoCD server
  set {
    name  = "server.resources.limits.cpu"
    value = "300m"
  }

  set {
    name  = "server.resources.limits.memory"
    value = "512Mi"
  }

  set {
    name  = "server.resources.requests.cpu"
    value = "100m"
  }

  set {
    name  = "server.resources.requests.memory"
    value = "256Mi"
  }

  # Enable metrics for monitoring
  set {
    name  = "server.metrics.enabled"
    value = "true"
  }
}

# Create an ACM certificate for HTTPS
resource "aws_acm_certificate" "argocd" {
  domain_name       = "<あなたのドメイン名>"  # Replace with your actual domain
  validation_method = "DNS"

  tags = var.tags

  lifecycle {
    create_before_destroy = true
  }
}

resource "aws_route53_record" "cert_validation" {
  for_each = {
    for dvo in aws_acm_certificate.argocd.domain_validation_options : dvo.domain_name => {
      name   = dvo.resource_record_name
      record = dvo.resource_record_value
      type   = dvo.resource_record_type
    }
  }

  allow_overwrite = true
  name            = each.value.name
  records         = [each.value.record]
  ttl             = 60
  type            = each.value.type
  zone_id         = "Z0604985M5PXV7QMVBX4"
}

resource "aws_acm_certificate_validation" "cert" {
  certificate_arn         = aws_acm_certificate.argocd.arn
  validation_record_fqdns = [for record in aws_route53_record.cert_validation : record.fqdn]
}

# Create a Route53 record for the ArgoCD domain
resource "aws_route53_record" "argocd" {
  zone_id = "<あなたのzone_id>"  # Same zone_id as used for certificate validation
  name    = aws_acm_certificate.argocd.domain_name
  type    = "CNAME"
  ttl     = 300

  # This is a placeholder. In a real-world scenario, you would need to get the ALB hostname dynamically.
  # For now, we're using a pattern that matches how AWS ALB Controller typically names the ALB.
  # You should replace this with the actual ALB hostname after the ALB is created.
  records = ["k8s-argocdalbgroup-dfd66c57f7-418058172.us-west-2.elb.amazonaws.com"]

  depends_on = [
    kubernetes_ingress_v1.argocd,
    aws_acm_certificate_validation.cert
  ]
}

# Create an Ingress resource for ArgoCD
resource "kubernetes_ingress_v1" "argocd" {
  metadata {
    name      = "argocd-ingress"
    namespace = kubernetes_namespace.argocd.metadata[0].name
    annotations = {
      "kubernetes.io/ingress.class"                    = "alb"
      "alb.ingress.kubernetes.io/scheme"               = "internet-facing"
      "alb.ingress.kubernetes.io/target-type"          = "ip"
      "alb.ingress.kubernetes.io/healthcheck-protocol" = "HTTP"
      "alb.ingress.kubernetes.io/healthcheck-port"     = "traffic-port"
      "alb.ingress.kubernetes.io/healthcheck-path"     = "/"
      "alb.ingress.kubernetes.io/listen-ports"         = "[{\"HTTP\": 80}, {\"HTTPS\": 443}]"
      "alb.ingress.kubernetes.io/ssl-redirect"         = "443"
      "alb.ingress.kubernetes.io/certificate-arn"      = aws_acm_certificate.argocd.arn
      "alb.ingress.kubernetes.io/group.name"           = "argocd-alb-group"
    }
  }

  spec {
    rule {
      http {
        path {
          path      = "/"
          path_type = "Prefix"
          backend {
            service {
              name = "argocd-server"
              port {
                number = 80
              }
            }
          }
        }
      }
    }
  }

  depends_on = [
    helm_release.argocd
  ]
}
以下のコマンドを実行してArgoCDをインストールします。
terraform apply
applyが成功したら以下のコマンドを実行して、ArgoCDの admin ユーザのパスワードを確認します。
kubectl -n argocd get secret argocd-initial-admin-secret -o jsonpath='{.data.password}' | base64 -d
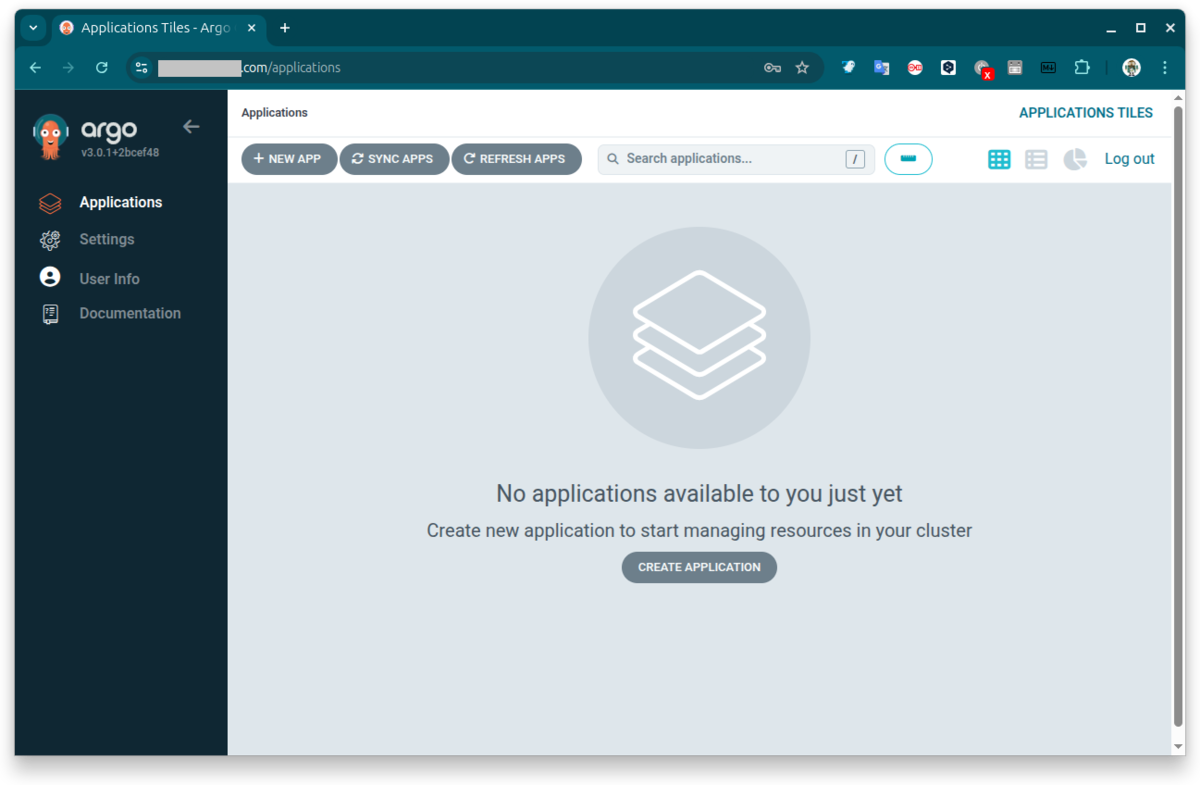
設定したドメインのURLをWebブラウザで開いて admin アカウントでログインすると以下のような画面が表示されます。
ArgoCDにアプリケーションを登録する
最後にArgoCDがGitOps用に使うGitHubリポジトリを登録して独自のアプリケーションをデプロイします。
まず、GitHubでアプリケーションのマニフェストファイルをコミットするリポジトリを作成してください。通常、これはプライベート・リポジトリになると思います。次に GitHubでaccess tokenを発行します。Tokenは classicの設定で、repo のアクセスができるようにします。アクセストークンの発行方法はこちら等を参照してください。
独自アプリケーション用のECRリポジトリの作成
ecr.tf ファイルを作成して独自アプリケーション用のECRリポジトリを作成します。
ecr.tf
# AWS ECR Repository Configuration

# Create an ECR repository
resource "aws_ecr_repository" "app_repository" {
  name                 = "${var.cluster_name}-app-repository"
  image_tag_mutability = "MUTABLE"

  image_scanning_configuration {
    scan_on_push = true
  }

  tags = var.tags
}

# Create a lifecycle policy for the ECR repository
resource "aws_ecr_lifecycle_policy" "app_repository_lifecycle" {
  repository = aws_ecr_repository.app_repository.name

  policy = jsonencode({
    rules = [
      {
        rulePriority = 1
        description  = "Keep last 10 images"
        selection = {
          tagStatus     = "any"
          countType     = "imageCountMoreThan"
          countNumber   = 10
        }
        action = {
          type = "expire"
        }
      }
    ]
  })
}

# Create an IAM policy for EKS to access ECR
resource "aws_iam_policy" "ecr_access_policy" {
  name        = "ECRAccessPolicy"
  description = "Policy to allow EKS to access ECR"

  policy = jsonencode({
    Version = "2012-10-17"
    Statement = [
      {
        Effect = "Allow"
        Action = [
          "ecr:GetDownloadUrlForLayer",
          "ecr:BatchGetImage",
          "ecr:BatchCheckLayerAvailability",
          "ecr:PutImage",
          "ecr:InitiateLayerUpload",
          "ecr:UploadLayerPart",
          "ecr:CompleteLayerUpload",
          "ecr:DescribeRepositories",
          "ecr:GetRepositoryPolicy",
          "ecr:ListImages",
          "ecr:DeleteRepository",
          "ecr:BatchDeleteImage",
          "ecr:SetRepositoryPolicy",
          "ecr:DeleteRepositoryPolicy"
        ]
        Resource = aws_ecr_repository.app_repository.arn
      },
      {
        Effect = "Allow"
        Action = [
          "ecr:GetAuthorizationToken"
        ]
        Resource = "*"
      }
    ]
  })
}

# Attach the ECR access policy to the EKS node role
resource "aws_iam_role_policy_attachment" "ecr_access_attachment" {
  policy_arn = aws_iam_policy.ecr_access_policy.arn
  role       = module.eks.eks_managed_node_groups["spot_nodes"].iam_role_name
}
以下のコマンドを実行してECRリポジトリを作成します。
terraform apply
サンプルとして、公式のNginxのコンテナのindex.htmlファイルをカスタマイズしたものをECRリポジトリにpushしておきます。
以下のコマンドを実行してください。
docker run -p 8080:80 nginx:latest
別のターミナルで、NginxのコンテナIDを確認します。確認した時のコマンドと結果の例を以下に示します。
$ docker ps
CONTAINER ID   IMAGE          COMMAND                   CREATED          STATUS          PORTS                                     NAMES
5af29a47396f   nginx:latest   "/docker-entrypoint.…"   12 seconds ago   Up 12 seconds   0.0.0.0:8080->80/tcp, [::]:8080->80/tcp   gifted_gates
次に以下を実行してコンテナをカスタマイズして、ECRリポジトリにイメージをpushします。ターミナルでの実行前に、AWSのコンソール画面画面でECRリポジトリを確認して、そこに記載の方法でECRリポジトリにログインしておいてください。
docker exec <前のコマンドのCONTAINER ID> bash -c 'sed -i "s/Welcome to nginx!/Welcome to customized nginx!/" /usr/share/nginx/html/index.html'
docker commit <前のコマンドのCONTAINER ID> <あなたのアカウントID>.dkr.ecr.us-west-2.amazonaws.com/<あなたのクラスタ名>-app-repository:latest
docker push <あなたのアカウントID>.dkr.ecr.us-west-2.amazonaws.com/<あなたのクラスタ名>-app-repository:latest
これで、Nginxのホーム画面が「Welcome to nginx!」から「Welcome to customized nginx!」に変わります。
プライベートリポジトリへのサンプルのマニフェストの作成
GitOps用のプライベートリポジトリで適当なディレクトリを作成して private-app.yaml EKSマニフェストファイルを作成します。
private-app.yaml
apiVersion: apps/v1
kind: Deployment
metadata:
  name: private-app
  namespace: default
  labels:
    app: private-app
spec:
  replicas: 2
  selector:
    matchLabels:
      app: private-app
  template:
    metadata:
      labels:
        app: private-app
    spec:
      containers:
      - name: private-app
        image: <あなたのアカウントID>.dkr.ecr.us-west-2.amazonaws.com/<あなたのクラスタ名>-app-repository:latest
        ports:
        - containerPort: 80
        resources:
          requests:
            cpu: 100m
            memory: 128Mi
          limits:
            cpu: 200m
            memory: 256Mi
        livenessProbe:
          httpGet:
            path: /
            port: 80
          initialDelaySeconds: 30
          periodSeconds: 10
        readinessProbe:
          httpGet:
            path: /
            port: 80
          initialDelaySeconds: 5
          periodSeconds: 5
---
apiVersion: v1
kind: Service
metadata:
  name: private-app
  namespace: default
  labels:
    app: private-app
spec:
  type: ClusterIP
  ports:
  - port: 80
    targetPort: 80
    protocol: TCP
    name: http
  selector:
    app: private-app
---
apiVersion: networking.k8s.io/v1
kind: Ingress
metadata:
  name: private-app-ingress
  namespace: default
  annotations:
    kubernetes.io/ingress.class: "alb"
    alb.ingress.kubernetes.io/scheme: "internet-facing"
    alb.ingress.kubernetes.io/target-type: "ip"
    alb.ingress.kubernetes.io/healthcheck-protocol: "HTTP"
    alb.ingress.kubernetes.io/healthcheck-port: "traffic-port"
    alb.ingress.kubernetes.io/healthcheck-path: "/"
    alb.ingress.kubernetes.io/listen-ports: '[{"HTTP": 80}]'
    alb.ingress.kubernetes.io/group.name: "private-app-alb-group"
spec:
  rules:
  - http:
      paths:
      - path: /
        pathType: Prefix
        backend:
          service:
            name: private-app
            port:
              number: 80
ArgoCDへのアプリケーションの登録
argocd_applications.tf ファイルを作成してArgoCDにアプリケーションを登録します。
argocd_applications.tf
実際に実行する場合は repoURL 、 path を変更してください。
# ArgoCD Applications

# Register sample/sample-nginx-alb as an ArgoCD application
resource "kubernetes_manifest" "nginx_alb_application" {
  manifest = {
    apiVersion = "argoproj.io/v1alpha1"
    kind       = "Application"
    metadata = {
      name      = "nginx-alb-sample"
      namespace = "argocd"
    }
    spec = {
      project = "default"
      source = {
        repoURL        = "https://github.com/<あなたのGitHubアカウント>/<リポジトリ名>"  # Private repository URL
        targetRevision = "HEAD"
        path           = "<あなたのアプリケーションのマニフェストファイルのディレクトリ>"
      }
      destination = {
        server    = "https://kubernetes.default.svc"
        namespace = "default"
      }
      syncPolicy = {
        automated = {
          prune    = true
          selfHeal = true
        }
        syncOptions = ["CreateNamespace=true"]
      }
    }
  }

  depends_on = [
    helm_release.argocd
  ]
}

# Output for the ArgoCD application
output "argocd_nginx_alb_application_name" {
  description = "Name of the ArgoCD application for Nginx ALB"
  value       = kubernetes_manifest.nginx_alb_application.manifest.metadata.name
}

output "argocd_nginx_alb_application_path" {
  description = "Path to the Nginx ALB manifests in the repository"
  value       = kubernetes_manifest.nginx_alb_application.manifest.spec.source.path
}

output "check_argocd_nginx_alb_application" {
  description = "Command to check the status of the Nginx ALB application in ArgoCD"
  value       = "kubectl get application nginx-alb-sample -n argocd"
}
variables.tf
GitHubのトークンをTerraformに渡すために以下を追加します。
# GitHub Configuration
variable "github_token" {
  description = "GitHub personal access token for accessing private repositories"
  type        = string
  sensitive   = true
}
以下のコマンドを実行してアプリケーションをデプロイします。
export TF_VAR_github_token="あなたのgithub-token"
terraform apply
applyが成功したら、以下のコマンドを実行して独自アプリケーションの公開URLを確認します。
kubectl get ingress nginx-ingress -o jsonpath='{.status.loadBalancer.ingress[0].hostname}'
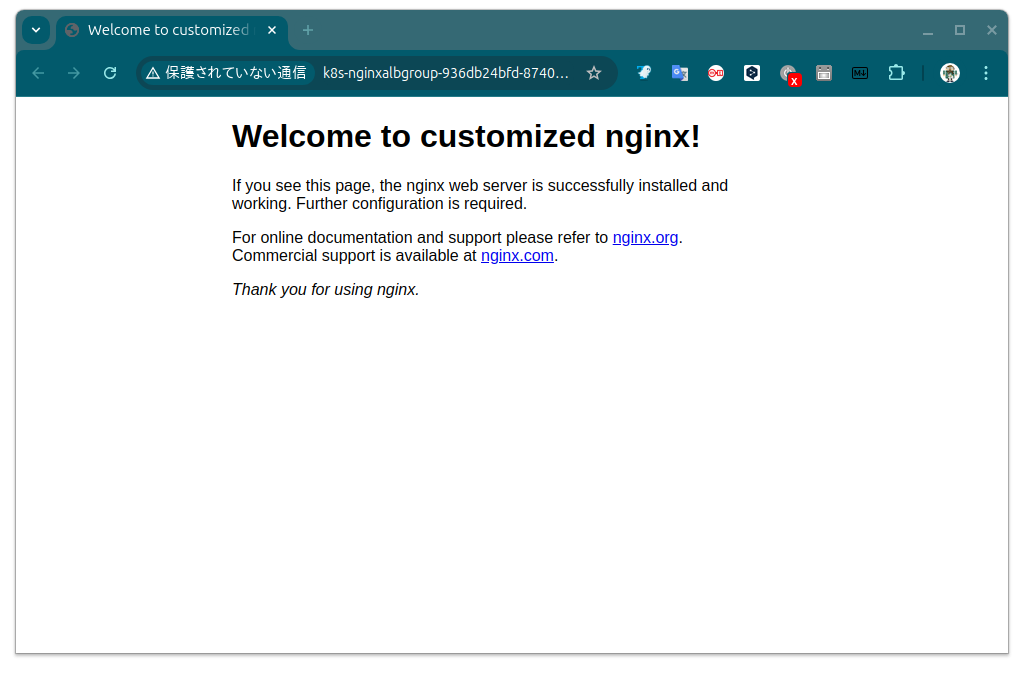
確認したURLをブラウザでアクセスするとカスタマイズした画面が表示されます。
まとめ
以上、ここまでの方法でArgoCDの設定までをIaCのコード化できるようになりました。