前の記事で、サービスメッシュを実現する Istio をローカル環境で利用してみましたが、今回は Amazon EKS で利用してみます。
Istio の EKS へのインストール
- ローカル環境で動作させるのと同様に、ローカルに Istio をインストールするのに必要なファイルをダウンロードしておきます。
- 現在の最新版のバージョンは
1.6.3です。
- 現在の最新版のバージョンは
- ダウンロードしたら、パスを通しておきます。
$ curl -L https://istio.io/downloadIstio | sh -
$ ls
istio-1.6.3/
$ cd istio-1.6.3/
$ export PATH=$PWD/bin:$PATH
$ istioctl version --remote=false
1.6.3
$ eksctl create cluster \
    --region us-east-2 \
    --name istio-on-eks \
    --nodes 2 \
    --ssh-public-key ~/.ssh/id_rsa.pub
$ istioctl manifest apply --set profile=demo
✔ Istio core installed
✔ Istiod installed
✔ Egress gateways installed
✔ Ingress gateways installed
✔ Addons installed
✔ Installation complete
- インストールされたことを確認します。
$ kubectl -n istio-system get svc
NAME                        TYPE           CLUSTER-IP       EXTERNAL-IP                          PORT(S)                                                                      AGE
grafana                     ClusterIP      10.100.13.94     <none>                               3000/TCP                                                                     2m40s
istio-egressgateway         ClusterIP      10.100.3.20      <none>                               80/TCP,443/TCP,15443/TCP                                                     2m48s
istio-ingressgateway        LoadBalancer   10.100.242.248   XXXXXX.us-east-2.elb.amazonaws.com   15020:32509/TCP,80:30139/TCP,443:32592/TCP,31400:30818/TCP,15443:32318/TCP   2m47s
istiod                      ClusterIP      10.100.136.6     <none>                               15010/TCP,15012/TCP,443/TCP,15014/TCP,53/UDP,853/TCP                         3m
jaeger-agent                ClusterIP      None             <none>                               5775/UDP,6831/UDP,6832/UDP                                                   2m40s
jaeger-collector            ClusterIP      10.100.200.183   <none>                               14267/TCP,14268/TCP,14250/TCP                                                2m39s
jaeger-collector-headless   ClusterIP      None             <none>                               14250/TCP                                                                    2m39s
jaeger-query                ClusterIP      10.100.3.189     <none>                               16686/TCP                                                                    2m38s
kiali                       ClusterIP      10.100.217.103   <none>                               20001/TCP                                                                    2m38s
prometheus                  ClusterIP      10.100.68.231    <none>                               9090/TCP                                                                     2m38s
tracing                     ClusterIP      10.100.25.38     <none>                               80/TCP                                                                       2m37s
zipkin                      ClusterIP      10.100.63.99     <none>                               9411/TCP                                                                     2m37s
- 作成された Pod も確認できます。
$ kubectl -n istio-system get pods
NAME                                    READY   STATUS    RESTARTS   AGE
grafana-5dc4b4676c-7fz2z                1/1     Running   0          3m39s
istio-egressgateway-5db676495d-gksd5    1/1     Running   0          3m46s
istio-ingressgateway-69bb66cb4b-9mt5w   1/1     Running   0          3m46s
istio-tracing-8584b4d7f9-84njr          1/1     Running   0          3m38s
istiod-5cdccfd474-rt9n7                 1/1     Running   0          3m58s
kiali-6f457f5964-rdbmd                  1/1     Running   0          3m38s
prometheus-d8b7c5949-v68wp              2/2     Running   0          3m37s
サンプルアプリのデプロイ
- ダウンロードしたファイル群にあるファイルを用いて、前回同様 Bookinfo アプリをデプロイします。
- マニフェストファイルは
istio-X.X.X/samples/bookinfo/platform/kube/bookinfo.yamlを利用します。
- マニフェストファイルは
$ kubectl create namespace bookinfo
namespace/bookinfo created
$ kubectl label namespace bookinfo istio-injection=enabled
namespace/bookinfo labeled
$ kubectl get ns bookinfo --show-labels
NAME       STATUS   AGE   LABELS
bookinfo   Active   20s   istio-injection=enabled
$ kubectl -n bookinfo apply -f samples/bookinfo/platform/kube/bookinfo.yaml
service/details created
serviceaccount/bookinfo-details created
deployment.apps/details-v1 created
service/ratings created
serviceaccount/bookinfo-ratings created
deployment.apps/ratings-v1 created
service/reviews created
serviceaccount/bookinfo-reviews created
deployment.apps/reviews-v1 created
deployment.apps/reviews-v2 created
deployment.apps/reviews-v3 created
service/productpage created
serviceaccount/bookinfo-productpage created
deployment.apps/productpage-v1 created
- デプロイ状況を確認します。
kubectl -n bookinfo get pod,svc
NAME                                  READY   STATUS    RESTARTS   AGE
pod/details-v1-78db589446-f2xp4       2/2     Running   0          2m20s
pod/productpage-v1-7f4cc988c6-c5hvc   2/2     Running   0          2m14s
pod/ratings-v1-756b788d54-r5sld       2/2     Running   0          2m19s
pod/reviews-v1-849fcdfd8b-bg4w6       2/2     Running   0          2m17s
pod/reviews-v2-5b6fb6c4fb-xq577       2/2     Running   0          2m16s
pod/reviews-v3-7d94d58566-mf9vx       2/2     Running   0          2m16s

NAME                  TYPE        CLUSTER-IP       EXTERNAL-IP   PORT(S)    AGE
service/details       ClusterIP   10.100.197.196   <none>        9080/TCP   2m23s
service/productpage   ClusterIP   10.100.149.23    <none>        9080/TCP   2m16s
service/ratings       ClusterIP   10.100.250.32    <none>        9080/TCP   2m21s
service/reviews       ClusterIP   10.100.104.219   <none>        9080/TCP   2m19s
- Bookinfo のアプリケーションは起動しましたが、外部からアクセスが出来るように、 Istio Gateway をデプロイします。
$ kubectl -n bookinfo apply -f samples/bookinfo/networking/bookinfo-gateway.yaml
gateway.networking.istio.io/bookinfo-gateway created
virtualservice.networking.istio.io/bookinfo created
- 以下のコマンドでアクセス先の URL を確認します。
$ kubectl -n istio-system get service istio-ingressgateway
NAME                   TYPE           CLUSTER-IP       EXTERNAL-IP                          PORT(S)                                                                      AGE
istio-ingressgateway   LoadBalancer   10.100.242.248   XXXXXX.us-east-2.elb.amazonaws.com   15020:32509/TCP,80:30139/TCP,443:32592/TCP,31400:30818/TCP,15443:32318/TCP   156m
- これで、
http://XXXXXX.us-east-2.elb.amazonaws.com/productpageにブラウザからアクセスすると、Bookinfo アプリの画面が表示されます。- 画面を複数回リロードすると、v1, V2, v3 の異なるバージョンの画面を確認できます。

トラフィックルーティングの設定を行う
- Istio の Traffic Management の機能を利用してみます。
サブセットの定義
- ルーティングを制御する前に、サブセットと呼ばれる使用可能なバージョンを定義する必要があります。以下のように、マニフェストファイルを利用してサブセットを定義します。
$ kubectl -n bookinfo apply -f samples/bookinfo/networking/destination-rule-all.yaml
destinationrule.networking.istio.io/productpage created
destinationrule.networking.istio.io/reviews created
destinationrule.networking.istio.io/ratings created
destinationrule.networking.istio.io/details created
- 適用したマニフェストファイルの中身を見てみます。
destination-rule-all.yaml の内容(クリックで展開)
apiVersion: networking.istio.io/v1alpha3
kind: DestinationRule
metadata:
  name: productpage
spec:
  host: productpage
  subsets:
  - name: v1
    labels:
      version: v1
---
apiVersion: networking.istio.io/v1alpha3
kind: DestinationRule
metadata:
  name: reviews
spec:
  host: reviews
  subsets:
  - name: v1
    labels:
      version: v1
  - name: v2
    labels:
      version: v2
  - name: v3
    labels:
      version: v3
---
apiVersion: networking.istio.io/v1alpha3
kind: DestinationRule
metadata:
  name: ratings
spec:
  host: ratings
  subsets:
  - name: v1
    labels:
      version: v1
  - name: v2
    labels:
      version: v2
  - name: v2-mysql
    labels:
      version: v2-mysql
  - name: v2-mysql-vm
    labels:
      version: v2-mysql-vm
---
apiVersion: networking.istio.io/v1alpha3
kind: DestinationRule
metadata:
  name: details
spec:
  host: details
  subsets:
  - name: v1
    labels:
      version: v1
  - name: v2
    labels:
      version: v2
---
ルーティングの設定
次に、トラフィックのルーティング設定を行います。VirtualService リソースを使います。
デフォルトで v1 の画面のみ表示されるようにする
$ kubectl -n bookinfo apply -f samples/bookinfo/networking/virtual-service-all-v1.yaml
virtualservice.networking.istio.io/productpage created
virtualservice.networking.istio.io/reviews created
virtualservice.networking.istio.io/ratings created
virtualservice.networking.istio.io/details created
- ここで適用したマニフェストファイルの内容は以下のとおりです:
virtual-service-all.yaml の内容(クリックで展開)
apiVersion: networking.istio.io/v1alpha3
kind: VirtualService
metadata:
  name: productpage
spec:
  hosts:
  - productpage
  http:
  - route:
    - destination:
    host: productpage
    subset: v1
---
apiVersion: networking.istio.io/v1alpha3
kind: VirtualService
metadata:
  name: reviews
spec:
  hosts:
  - reviews
  http:
  - route:
    - destination:
    host: reviews
    subset: v1
---
apiVersion: networking.istio.io/v1alpha3
kind: VirtualService
metadata:
  name: ratings
spec:
  hosts:
  - ratings
  http:
  - route:
    - destination:
    host: ratings
    subset: v1
---
apiVersion: networking.istio.io/v1alpha3
kind: VirtualService
metadata:
  name: details
spec:
  hosts:
  - details
  http:
  - route:
    - destination:
    host: details
    subset: v1
---
- これにより、何度ブラウザを更新しても v1 の画面しか表示されなくなります。

特定のユーザーからのトラフィックに対する設定
- 次に、特定のユーザーからのトラフィックが特定のサービスのバージョンにルーティングされるようにルート設定を変更します。
- いわゆる、Feature Toggle (Feature Flag) でルーティングを設定できます。
- 下記のようにマニフェストファイルを適用します:
$ kubectl -n bookinfo apply -f samples/bookinfo/networking/virtual-service-reviews-test-v2.yaml
virtualservice.networking.istio.io/reviews configured
- 適用したマニフェストファイルの中身は以下の通りです:
- Bookinfo アプリでは、ユーザ名が
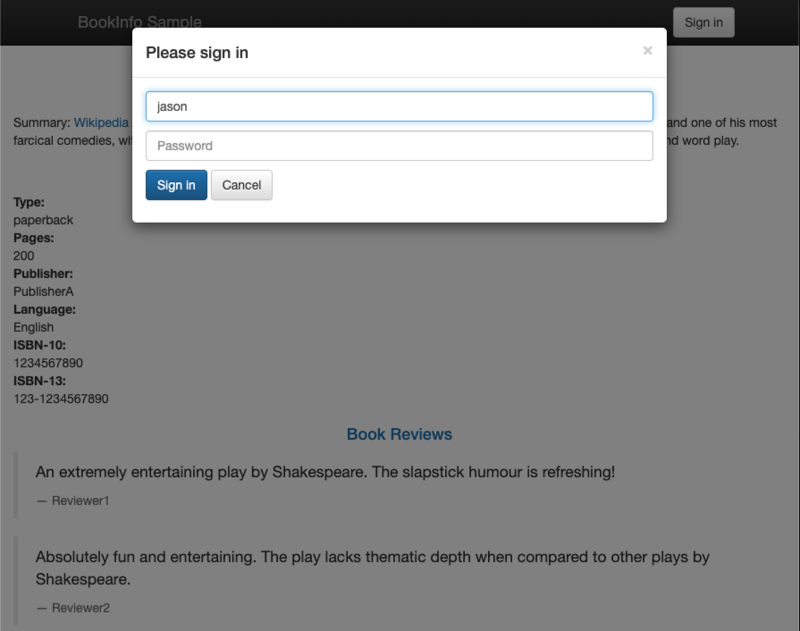
end-userというヘッダに格納される仕様になっています。 matchでend-userヘッダの値をが意図するものかを確認し、マッチする場合はrouteの設定が適用されます。- 今回は jason というユーザー(パスワードは空白)に対しては v2 のみ、それ以外のユーザーは v1 の画面が表示されるようになります。
- Bookinfo アプリでは、ユーザ名が
virtual-service-reviews-test-v2.yaml の内容(クリックで展開)
apiVersion: networking.istio.io/v1alpha3
kind: VirtualService
metadata:
  name: reviews
spec:
  hosts:
    - reviews
  http:
  - match:
    - headers:
    end-user:
      exact: jason
    route:
    - destination:
    host: reviews
    subset: v2
  - route:
    - destination:
    host: reviews
    subset: v1


バージョンごとにルーティングを振り分ける重みをつける
$ kubectl -n bookinfo apply -f samples/bookinfo/networking/virtual-service-reviews-50-v3.yaml
virtualservice.networking.istio.io/reviews configured
- マニフェストファイルの中身は以下のとおりです:
route.weightでルーティングの重みをつけることが出来ます。- この値は、全て足して 100 になるように設定する必要があります。
- 今回の場合、すべてのユーザーで v1 と v3 が半々の確率で表示されるようになります。
virtual-service-reviews-50-v3.yaml の内容(クリックで展開)
apiVersion: networking.istio.io/v1alpha3
kind: VirtualService
metadata:
  name: reviews
spec:
  hosts:
    - reviews
  http:
  - route:
    - destination:
    host: reviews
    subset: v1
      weight: 50
    - destination:
    host: reviews
    subset: v3
      weight: 50
- 先程の
matchと合わせて、特定のユーザーだけ様々なバージョンに振り分ける、といった使い方も可能です。
お片付け
cleanup.sh の適用(クリックで展開)
$ export NAMESPACE="bookinfo"
$ samples/bookinfo/platform/kube/cleanup.sh
namespace ? [default] bookinfo
using NAMESPACE=bookinfo
destinationrule.networking.istio.io "details" deleted
destinationrule.networking.istio.io "productpage" deleted
destinationrule.networking.istio.io "ratings" deleted
destinationrule.networking.istio.io "reviews" deleted
virtualservice.networking.istio.io "bookinfo" deleted
virtualservice.networking.istio.io "details" deleted
virtualservice.networking.istio.io "productpage" deleted
virtualservice.networking.istio.io "ratings" deleted
virtualservice.networking.istio.io "reviews" deleted
gateway.networking.istio.io "bookinfo-gateway" deleted
Application cleanup may take up to one minute
service "details" deleted
serviceaccount "bookinfo-details" deleted
deployment.apps "details-v1" deleted
service "ratings" deleted
serviceaccount "bookinfo-ratings" deleted
deployment.apps "ratings-v1" deleted
service "reviews" deleted
serviceaccount "bookinfo-reviews" deleted
deployment.apps "reviews-v1" deleted
deployment.apps "reviews-v2" deleted
deployment.apps "reviews-v3" deleted
service "productpage" deleted
serviceaccount "bookinfo-productpage" deleted
deployment.apps "productpage-v1" deleted
Application cleanup successful

$ kubectl delete ns bookinfo
namespace "bookinfo" deleted
- 次に、
istioctlで表示した以下のリソースを標準出力に出力し、それをkubectl deleteに渡すことで、削除します。- ロールベースアクセス制御(RBAC)のアクセス権
- istio-system 名前空間
- 階層的にその下にあるすべてのリソース
$ istioctl manifest generate --set profile=demo | kubectl delete -f -
kubectl delete -f -はパイプラインで渡された標準出力の内容を基に、 K8s オブジェクトを削除します。
まとめ
- サービスメッシュを実現する Istio を Amazon EKS で利用してみました。
- サービスのトラフィックルーティングの設定を通して、Istio の Traffic Management の機能の概要を理解しました。
- Istio のサービスメッシュ外のサービスとのアクセス方法については、別の機会に試してみます。
参考資料
- Amazon EKS Workshop の 「Service Mesh with Istio」
- 全体の手順を参考にしました。
- サービスメッシュを実現するIstioをEKS上で動かす - その2 EKSでサンプルを動かしてみる
- 上記ワークショップの内容の理解に参考にしました。